I want to welcome you to this blog hop that will begin on November 12th and go through to Nov 17th. This blog hop is brought to you by me, A...

Blog Hop Announcement!!

I want to welcome you to this blog hop that will begin on November 12th and go through to Nov 17th. This blog hop is brought to you by me, Angela Holt and sponsored by Want2scrap. There will fabulous blogs to hop too, prizes to be won and more!!! I hope that you can attend!!! There will be a facebook event started for this hop so that you can book make the time. Also, if you would like to share this with you fellow crafters, you can snag the blinkie to the left<----------.

I cant wait to share with you the wonderful blogs that you will be hopping to, the awesome projects that will be made, and simply bringing in the Holiday cheer!!!


Thank you!!

Your Crafting Educator,
Angela Holt

There is a new trend this year hitting the galleries among crafters. This trend is taking the basic shape of an ornament such as the ones of...

First Christmas Ornaments of the Year

There is a new trend this year hitting the galleries among crafters. This trend is taking the basic shape of an ornament such as the ones offered by Sizzix, also Silhouette America has some fabulous ones too. No matter where you find your ornament shape, you can be sure that it will be the forefront of most ornament making projects this year.

I took various shapes of ornaments from my Silhouette Downloads and created the following two styles. The First style is a non-traditional approach. I used blacks and creams and of course BLING!!!

 This Ornament was created using a fabulous download from my Silhouette. I cut out a total of 12 of the same shape. I then folded 6 of them in half and glues the folded pieces on top of the 6 that were not folded to give it a 3D look. I then glues piece of black tulle in the middle and adorned the piece with a jeweled center and Want2scrap Bling. The dangle was from an old string of jeweled garland I got in a box of broken ornaments at a yard sale.


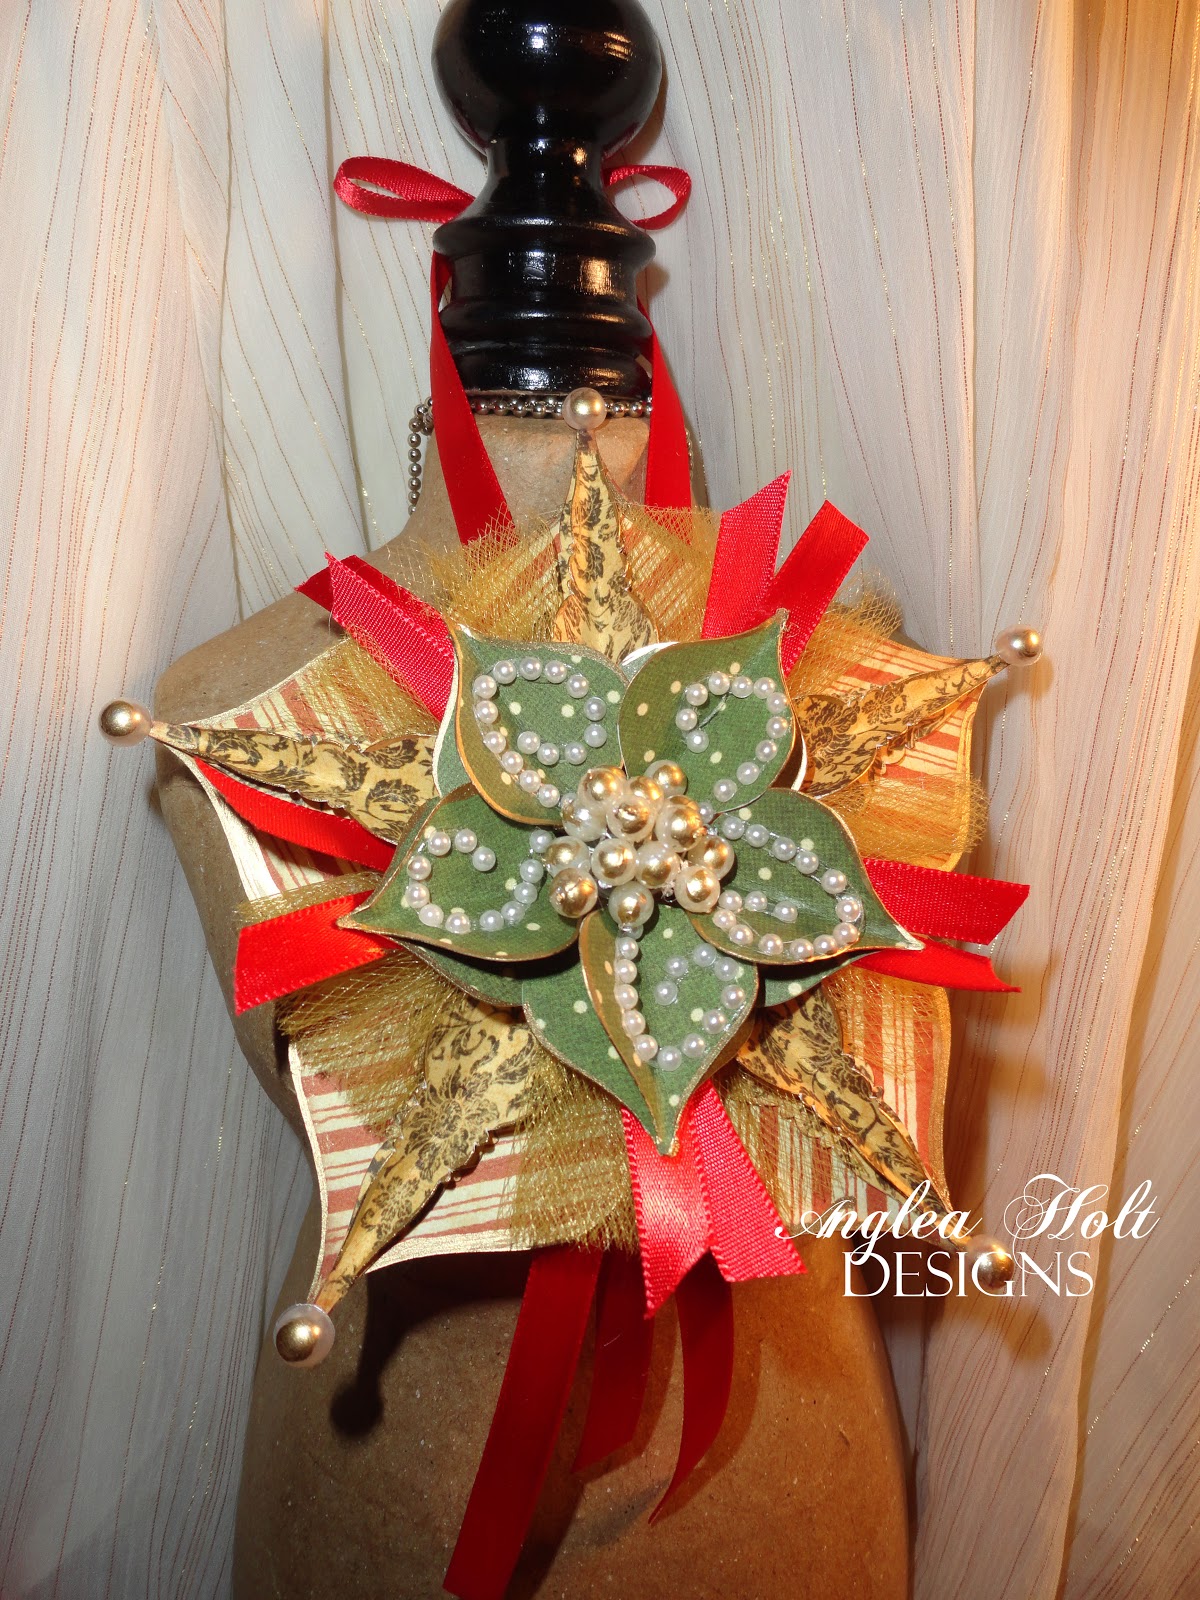
Using the same concept above, I cut 3 different styles of ornaments from my silhouette and glued them as you see in the photo. Adorned with pearls, gold tulle and red ribbon, this ornament carries the more traditional look for the Holidays. This concept it fabulous, easy and lends the creativity to be endless in style and designing with these shapes. 

I hope these projects get your geared up to being your Holiday crafting a little early this year. IF you should have any questions on how I made these, please let me know!!

Your crafting Educator,
Angela Holt

I love to revamp things all the time. I was on a shopping spree at the Goodwill with mom and come across this small silver tray. It sat on m...

Easy as 1 2 3 Project

I love to revamp things all the time. I was on a shopping spree at the Goodwill with mom and come across this small silver tray. It sat on my craft table for weeks until I had an ideas to pop in my head as to what to do with it. I tell you my fellow crafters, it was as easy as 1  2  3.......  Here is what I did. 

 STEP 1.  I gathered my tray and made sure that it was real clean. Then I grab my Canvas Corp "Chalkstock" that is ideal for chalks and gel pens. It is just like a sheet of chalkboard!!!


 STEP 2 (AND A FAB TRICK)!! I flipped the tray over and inked the edges I then laid the tray on top of the Chalkstock and pretty much stamped it. I then cut out the shape and it was a perfect fit to the bottom of the tray. Something to keep in mine when you are working with an odd project and have a hard time making a piece to inlay inside!!!


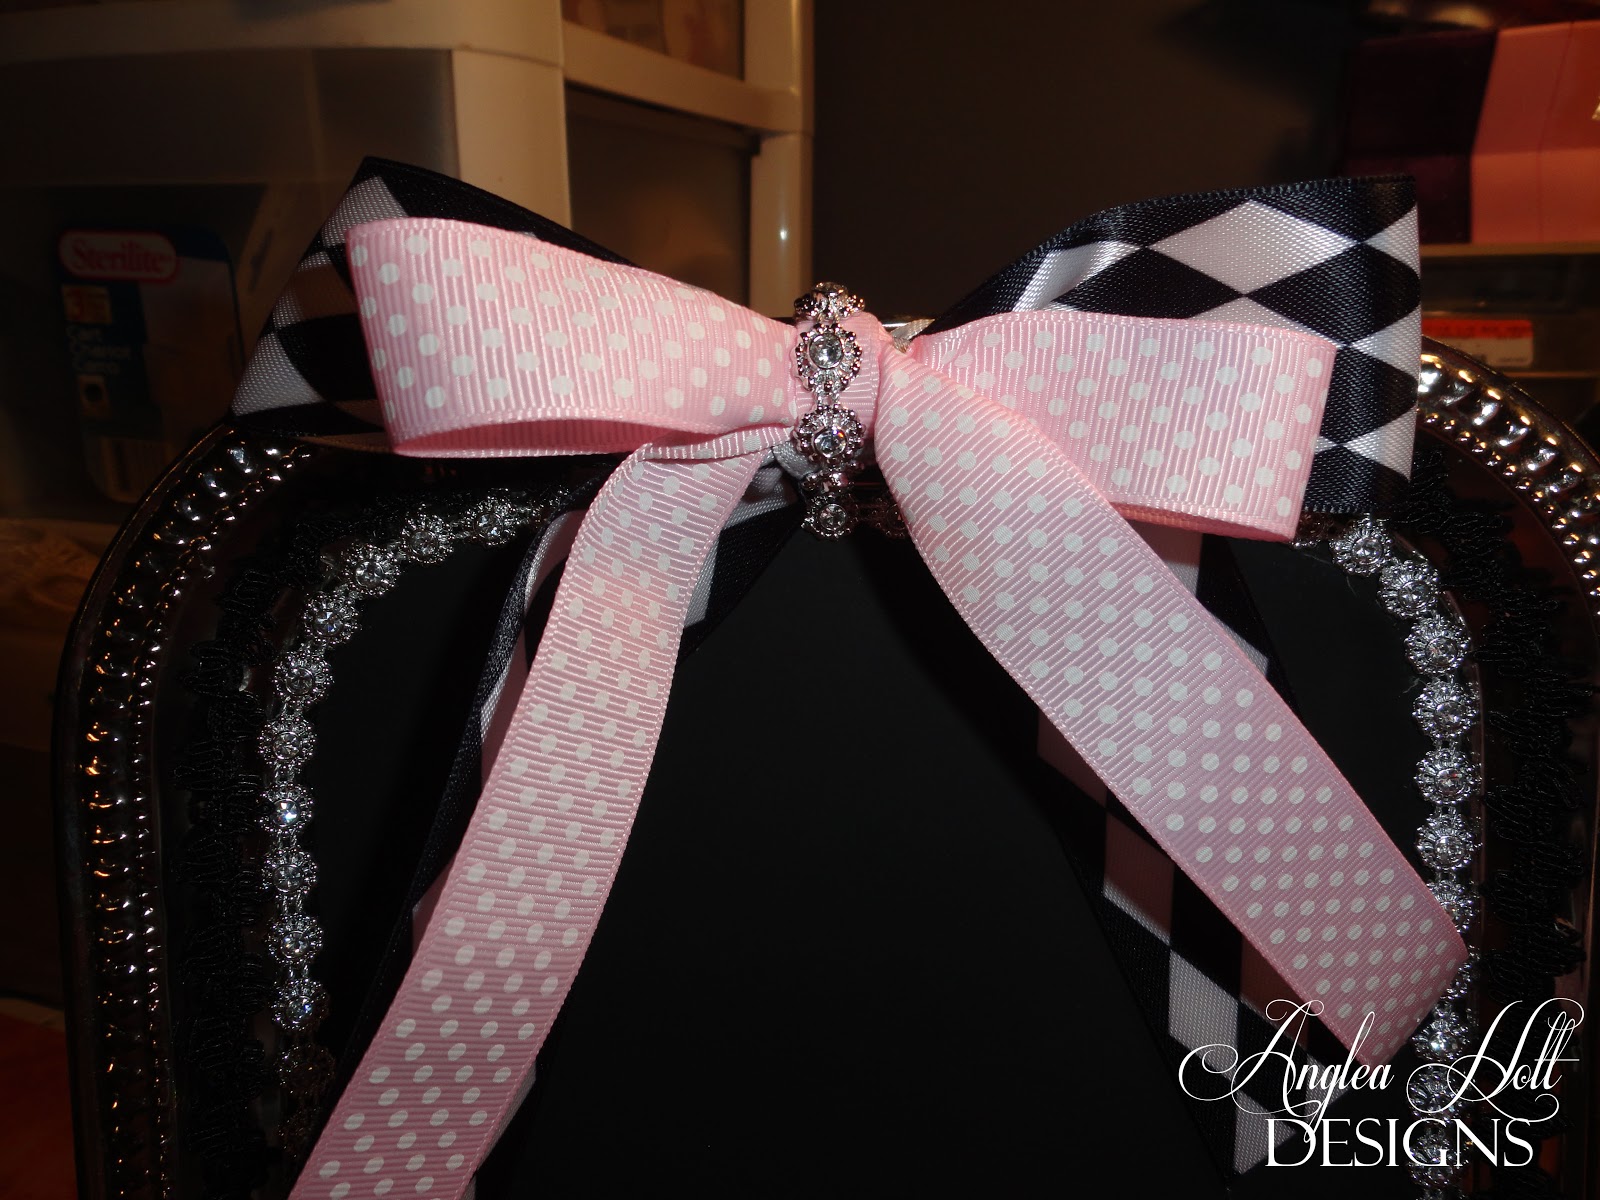
 STEP 3.  Decorate!!! Grab some fab ribbons make a bow and adhear to the top!!


 Line the inside with various trims and rhinestone trim.


BAM!!! You have an altered tray as easy as 1  2 3  .........

I hope this brings you some blingy inspiration to your day!!! 

Your crafting Educator

Angela Holt

I will be hosting a Holiday blog hop. Nothing is more exciting than to see festive ideas that will helps us along the way this Christimas se...

Holiday Blog Hop Details.

I will be hosting a Holiday blog hop. Nothing is more exciting than to see festive ideas that will helps us along the way this Christimas season. I'm asking Particpants to create something geared around the Holiday season. This can be in range of, Great gift ideas, scrapbook pages, cards, mixed media items such as party favor ideas, ornaments to give as gifts and more!!! There is no set rule, only that it should carry the Holiday theme.  Entice us with new ribbon ideas, folding ideas, share you tips and tricks how you create for the season.

This hop will be a sponsored event. I will be sending participants a small gift in the mail that they are welcome to use in their projects. Although it is not required, it would be great to see how you use the gift. You could even make 2 projects to share with the readers.

If this sounds like something you would like to particpate in, please contact me by either on facebook or by email. See links below.

I would love for you all to share in this wonderful event!!

Your craft Educator, Angela Holt

Email: thealteredpage@yahoo.com

Facebook: https://www.facebook.com/angelaholtdesign

Part of my job is to make sure I stay up to date with the latest trends and crafty ideas that have been hitting the crafting industry and am...

Get crafty with it!!

Part of my job is to make sure I stay up to date with the latest trends and crafty ideas that have been hitting the crafting industry and among crafters. Over the course of the past few months I have seen " A lot of Layers" happening. Could this be because we are all having to save our pennies and pulling out the scraps? Or could this be that we want to add more definition and dimension to our paper crafting projects?

While Layering Paper has been around for a long time, you visit any designer gallery and you will find many examples of how it is quickly becoming the “go-to” technique for adding dimension and depth to a project this year. 

The one company that is in the fore front in this technique is Graphic 45. Graphic 45 lends the crafter to build such amazing depth to any project. Here is a great example. 

Created by the ever so talented Tara Orr ( Designer at Bo Bunny, Graphic 45, ZVA Creative and 7 Dots Studio), you can see the amazing layering. When you look at this piece, your eye is carried deeper into the design with the layers. You can look at this card over and over again and always find something new that you have not seen before. Such as the beautiful purple pearls that are scattered throughout the piece. To find more of her fabulous designs that carry this layering concept, visit her blog at "Each Moment, Only Once". Her attention to detail is amazing.Thank you so much Tara for allowing me to showcase your beautiful creation!! 


Another fabulous Designer taking on a new direction to layering, is Irene Tan aka Scrapperlicious. I have been following her work for years and with her kind permission she has allowed me to share with you another fabulous example of Layering. 
 This "Oct 31 ATC' is a great example of adding depth and showcasing amazing layering techniques on a much smaller scale. As you can see, she added dimension through building up the layers and then wowing you with a bold choice of deep red flowers. Hidden away are key elements such as the almost hidden Tim Holtz Trinket Pin that has been brushed white!!. It is these hidden details, that make you see new things each time you revisit the piece. In this case, the more the more exciting!!! Thank you so much Irene for allowing me to showcase your amazing ATC. IF you would like to see more of her amazing work visit her blog at  "Scrapperlicious"

The Holidays are coming and I could not be more inspired to begin my Christmas creations than with Kottens fabulous Christmas Card
 
Kotten showcases the Layering concept with her eye to bring you deeper into this card. I love the fact that the elements are brought front and center while you are still draw into the background with a matting technique. Adding the details of the burlap brings out the vintage feel to this card. This paper line used for this card are from the Maja Design It's Christmas Time collection. If you would like to see more fabulous festive creations she has created using this paper collection be sure to stop by her blog at Kottens Corner
Kotten, thank you so much for bringing such a beautiful card for us to be inspired with and for allowing me to use it here for my readers. 

As you can see, I have brought to you 3 fabulous examples of the "Layering". This is a tried and true concept but this year it has been introduced to us crafters in ways that are innovative, interesting and forever inspirational. Thank you ladies so much for your creations. I look forward to seeing more of your designs and to be inspired. 

So I'm off to go do some "Layering" 2012 style!!

Your crafting Educator,

Angela Holt

I have been super busy both online and in my personal life. But I'm oober excited to announce the launch of my new Challenge Blog. This ...

Updates!!!


I have been super busy both online and in my personal life. But I'm oober excited to announce the launch of my new Challenge Blog. This blog was created to entice our creative juju flowing. There are times when I find myself in a block and need some sort of foundation to begin with or and idea set. This will give not only me but all who want to participate a chance to harness their creativity into a set design concept. Each month there will be challenges and fabulous prizes to give away give out by me and my sponsors!!!

You are invited to come and create along with me. Check the link below and read for all the details!!!


Here is another creation with a Halloween theme I have been working on the past few days. I have the huge bag of Wine Corks and some Tim Hol...

Boo Necklace Project!!

Here is another creation with a Halloween theme I have been working on the past few days. I have the huge bag of Wine Corks and some Tim Holtz products; I just had to put them together and create something perfect for Halloween. Here is what I did.............

 I created this charm using many elements. First I dug in my Yard Sale Jewelry Stash and pulled out some orange and white beads. I then add hand painted polka dots to give it a more whimsical look. These beads hand from the top and bottom of the piece. The top is adorned with a check board Bow for added whimsy.


 I cut the Wine cork out to fit the smallest bottle from Tim Holtz. It worked perfect for this concept. Once I cut it out, I painted the whole thing cork black before I inserted the bottle. The bottle is filled with Purple Glitter, wrapped in a orange ribbon and labeled Boo Dust.


 As you can see from this picture, the Wine cork has been painted with black and white stripes using acrylic paint.


 The Final piece is using Tim Holtz Fragment Charm that has been glued to a cardstock sticker reading October 31st. I tied a purple bow and added a Want2scrap adhesive rinestone to tie in the orange and purple theme through the piece.


So pull out your bits of this and that and see what kind of haunting charm necklace you can come up with. This was such fun to make and I plan on showing you how to make another style of Wine Cork Charm Necklace perfect for gifts etc... with the same concept on my show this coming Thursday night at 7pm central!!!

Book mark the show by CLICKING HERE!!!

Happy Halloween
Your Professional Craft Educator
Angela Holt