Etched Glass Jewelry Tray
Here is another fabulous tutorial brought to you by me Angela Holt using the fabulous Glass Etching Product called Etchall which you can purchase as www.etchall.com
Today I'm going to show you step by step how I created this simple but elegant piece. The difference in the design I created is that I made it my own by piecing shapes and patterns together in a design style I liked!!! So lets begin this awesome tutorial for.....
Etched Glass Jewelry Tray
Here we go!!!
I purchased this tray at the local thrift store. The tray was originally brass and someone painted it black. There were a few inperfections on the glass but Etchall is amazing in helping to mask these.
The first thing I did was take the glass out and clean it!!! This is very important that you clean your surface of your glass before you begin etching!!!
Cut your design out using the YELLOW Etchall Etching Mask as I have shown you in previous tutorials!! This is super fun and cuts through my Silhouette Cameo like butter.
Remember with this step you need to place the YELLOW Etching Mask down face first on to the Etching Transfer Paper sheet as you see above!!!
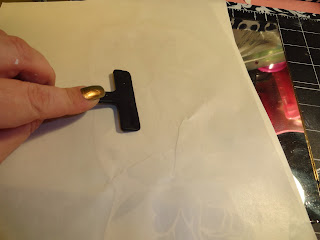
Place the Etching Mask Transfer Paper back over the design and and burnish with your Squeegee tool to make sure you have good contact for transferring.
Dont forget to pull the backing off your YELLOW etching paper to reveal the sticky side. NEXT...
you will place the sticky side down onto your glass!!! NOW I use my squeegee tool to burnish and make sure that I have all my edges are down and secure. I dont want any Etchall running under the image!!!
Peel back the etching mask and reveal your design. you see that I have some raised areas still. A great TIP is to take a piece of typing paper lay it back over your design and burnish again with your Squeegee tool. This will help lay down the stubborn edges and also eliminate you from tearing and stretching your design edges.
VERY IMPORTANT!!!
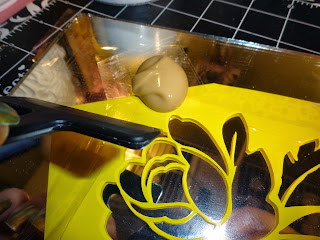
if you want only the design to be etched it is best to tape off the edges of your mirror. I used box tape for demo purposes but painters tape is great too!!! OVER LAP on to the design but not so much to cover it so that NO etching cream will spill out on to the un-etched surface.
Now as you can see from the photo at the top, I made a little pile of etching cream because for best results and the proper way to etch you are going to pull the etching cream across the design. Showed in the photo below. As you can see I have no fear of this pile of etching cream runing my design because I TAPED OFF the edges first!!!!
As you can see I pulled the etching cream to my design. This lends great coverage and for a beautiful etch!!! NOTE: YOU WANT TO BE VERY GENEROUS WITH THE CREAM!!! you want to be very heavy with it in that you almost cant see your design!!! DONT WORRY!!!! ONLY ETCHALL CAN BE SCRAPED BACK OFF AND RETURNED TO THE BOTTLE FOR ANOTHER ETCHING DAY!!! SO THERE IS NO WASTE HARDLY AT ALL!!! REUSE!!!
Allow the etching cream to etch for 15 min as instructed on the bottle.
Once my design 1 was etched I followed the same steps as above and pieced some designs I cut out myself around the previously etched design!! To ensure that I only etched the smaller designs placed around the roses, I used my Etchall Designer Tips to do this!
and here are the RESULTS!!!
I hope this tutorial helps you more and more to create with this wonderful medium!! I love creating with Etchall and bringing to my home and to my friends and family wonderful etched designs that will be conversation pieces for years to come!!!
ORDER ALL YOU ETCHALL PRODUCTS AT
www.etchall.com
SHOW THE LOVE AND TELL THEM IN THE MEMO SECTION I SENT YOU
ANGELA HOLT!!
Until next fab tutorial or video!!!
Your Professional crafting educator and designer
Angela Holt
As I have shown you in tutorial before you are going to take Etchall's Etching Mask and cut out your design. This design I used here is from the Silhouette Download store just search roses and you will see many awesome designs.


2 comments
This is beautiful!!
ReplyDeleteGorgeous transformation Angela !! loved it
ReplyDeletewww.kalasirjana.blogspot.in